


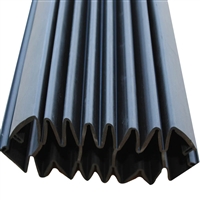
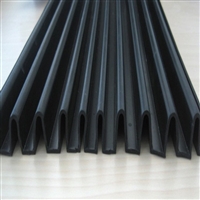

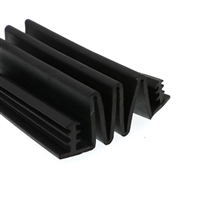

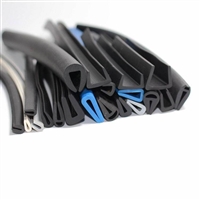

Haichen supplies curtain wall expansion joint rubber strips, EPDM accordion rubber strips, accordion type rubber strips, accordion board rubber strips, and manufacturers
Category:
Rubber and plastic/Industrial rubber products/Industrial rubber products
Model:
Brand:
Haichen
brand:
Haichen
material:
natural rubber
type:
rubber products
shape:
strip
Scope of Application:
Construction machinery, highway bridges, curtain walls
purpose:
Sealed, anti-collision, windproof, anti-skid, dustproof and waterproof
color:
black
grade:
Organ glue strip
Is it imported:
No
Item Number:
01
product grade:
Level 1
Product Specifications:
Customized to requirements
manufacturer:
Hengshui Haichen
Retail Price
2.80USD
重量
kg
- Product Description
-
brand Haichen
material natural rubber
type rubber products
shape strip
Scope of Application Construction machinery, highway bridges, curtain walls
purpose Sealed, anti-collision, windproof, anti-skid, dustproof and waterproof
color black
grade Organ glue strip
Is it imported No
Item Number 01
product grade Level 1
Product Specifications Customized to requirements
manufacturer Hengshui Haichen
Description :
Construction steps of rubber strip for organ type expansion joint:
1. Drawing lines and cutting grooves: Draw lines at the pre embedded groove positions according to the construction drawing scale, cut the asphalt pavement along the drawn lines, with a cutting depth not less than the asphalt thickness, and control the straightness within 5mm.
2. Slotting: Use a pneumatic pick to chisel the groove to remove the asphalt, clear the residual and debris in the groove area, chisel the groove depth to the required depth on the plan drawing, and clean the groove with an air compressor.
3. Assembly and welding of anchor bolts: Pre arrange the serrated seams according to the planned length, label them with serial numbers, and tighten the bolts. Weld the threaded bars and screws in a quiet position, unscrew the nuts, place the welded steel cage into the groove, and weld it with the embedded parts.
4. After welding the steel cage with the embedded parts, the equipment formwork should be stable and compact to prevent mold expansion or leakage during concrete vibration. After the template equipment is completed, blow the groove with an air compressor and wrap the exposed rod thread with tape together.
5. Pouring concrete under the comb shaped plate: Use a pull-out vibrator to vigorously and evenly vibrate according to the requirements, and after compaction, use a trowel to grind the surface below.
6. Equipment comb plate: equipment waterproof rubber plate, stainless steel sliding plate, and equipment stabilizing plate according to the number, and equipment sliding plate according to the number. Slide and level the comb plate elastic device and the stabilizing plate in front of the device, and then use a stabilizing card to stabilize the two plates (sliding plate and stabilizing plate) into one, making it flat, without any misaligned or crooked teeth. Then lift the toothed plate bolts to make them equal to the pre embedded bolts before dropping the plate. When using the equipment for toothed plate elasticity, use a 3m level ruler to measure the flatness along the road surface. After adjustment is complete, remove the stable fixture to ensure that the sliding toothed plate seam slides smoothly and elastically. Be careful to close the countersunk bolts of the toothed plate seam with sealant to avoid loosening and falling nuts, which may cause adverse effects.
7. After the completion of the toothed plate elastic equipment, reserve a groove on the back side of the toothed plate joint and pour C50 concrete again, requesting vibration and compaction, and grinding the outside to be complete.
8. Protection: After the construction is completed, be careful to stop watering the concrete for protection, tighten the nuts one by one, and inject epoxy resin into the holes.


AfterSalesService :
Key words:- Curtain wall expansion joint adhesive strip
More Products


